If your kindergarteners are calling every circle a ball or insisting that a triangle is “pointy like a cone,” you’re witnessing one of the most common geometry challenges in early elementary. The ability to distinguish between two-dimensional and three-dimensional shapes is fundamental to spatial reasoning, yet it’s surprisingly tricky for five and six-year-olds to master.
You’ll walk away from this post with five research-backed strategies that help kindergarteners confidently identify flat shapes versus solid shapes, plus differentiation tips for every learner in your classroom.
Key Takeaway
Kindergarteners learn 2D vs 3D shapes best through hands-on exploration that emphasizes the key difference: flat shapes lie completely flat, while solid shapes take up space and have thickness.
Why 2D vs 3D Shape Recognition Matters in Kindergarten
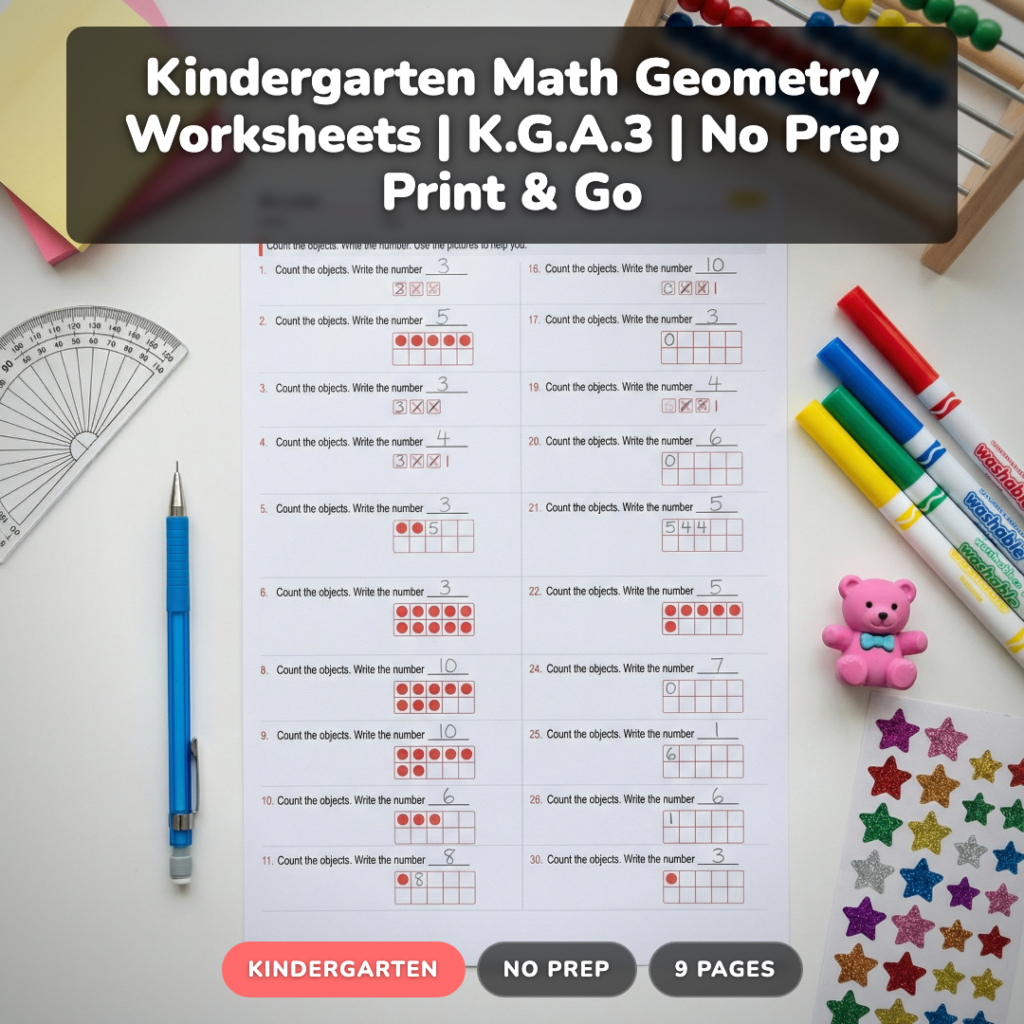
The Common Core standard CCSS.Math.Content.K.G.A.3 requires kindergarteners to identify shapes as two-dimensional (lying in a plane, “flat”) or three-dimensional (“solid”). This foundational skill supports spatial reasoning development, which research shows correlates strongly with later STEM achievement. According to the National Research Council, early geometry instruction that emphasizes shape properties rather than just naming builds critical thinking skills that transfer to measurement, fractions, and algebraic thinking in later grades.
This standard typically appears in the second half of kindergarten, after students have had time to explore basic shape identification. Most kindergarten curricula introduce 2D shapes (circle, triangle, square, rectangle) in the fall, then add 3D shapes (sphere, cube, cone, cylinder) in winter or spring. The key cognitive leap happens when students move beyond memorizing shape names to understanding the fundamental difference between flat and solid objects.
Looking for a ready-to-go resource? I put together a differentiated kindergarten geometry pack that covers everything below — but first, the teaching strategies that make it work.
Common 2D vs 3D Shape Misconceptions in Kindergarten
Understanding why kindergarteners struggle with this concept helps you address confusion before it becomes entrenched. Here are the four most frequent misconceptions:
Common Misconception: All circles are balls, and all balls are circles.
Why it happens: Students focus on the round outline rather than dimensionality. They see the circular face of a sphere and call it a circle, or see a drawn circle and imagine it as a ball.
Quick fix: Use the “flat hand test” — can you put your hand completely flat against it?
Common Misconception: Triangular prisms, pyramids, and flat triangles are all “triangles.”
Why it happens: Students notice the triangular faces on 3D shapes and apply the 2D name to the entire object.
Quick fix: Teach them to count faces — flat triangles have one face, solid shapes have multiple faces.
Common Misconception: Thin objects like paper or books are “flat” shapes.
Why it happens: Students confuse “thin” with “flat.” A piece of paper feels flat but is actually a very thin rectangular prism.
Quick fix: Emphasize that truly flat shapes exist only on surfaces — they can’t be picked up and held.
Common Misconception: Pictures of 3D shapes are the same as actual 3D shapes.
Why it happens: Students don’t distinguish between representations and actual objects.
Quick fix: Always use real 3D objects alongside pictures, emphasizing “This is a picture of a cube, but this block is an actual cube.”
5 Research-Backed Strategies for Teaching 2D vs 3D Shapes
Strategy 1: The Flat Hand Test
This kinesthetic approach gives students a concrete way to test whether shapes are flat or solid. Students learn to place their hand completely flat against 2D shapes, while 3D shapes prevent their hand from lying flat because of thickness or curves.
What you need:
- Laminated 2D shape cutouts
- 3D manipulatives (blocks, balls, cones)
- Chart paper for recording results
Steps:
- Model placing your hand flat against a circle cutout, emphasizing how your entire palm touches the shape
- Try the same motion with a sphere, showing how your hand curves around it instead of lying flat
- Have students test 5-6 different objects using the flat hand test
- Record results on a T-chart: “Flat Hand Fits” vs “Flat Hand Doesn’t Fit”
- Introduce vocabulary: shapes where flat hands fit are “2D” or “flat,” others are “3D” or “solid”
Strategy 2: Shape Sorting with Real Objects
Students develop shape recognition by physically sorting classroom objects and toys into 2D and 3D categories. This strategy builds on kindergarteners’ natural love of sorting while reinforcing the key concept through repeated practice.
What you need:
- Collection of classroom objects (pattern blocks, wooden blocks, paper shapes, balls, books)
- Two sorting bins labeled “Flat Shapes” and “Solid Shapes”
- Magnifying glasses (optional, but kids love them)
Steps:
- Start with 8-10 very clear examples (paper triangle, wooden cube, circle sticker, sphere)
- Model sorting the first few items, thinking aloud about your decision-making
- Have students work in pairs to sort the remaining objects
- Circulate and ask “How do you know?” to push their reasoning
- Gather to discuss any items that caused disagreement
- Add new objects daily to keep the activity fresh
Strategy 3: Shape Tracing vs Shape Holding
This strategy helps students understand that 2D shapes can be traced around their edges, while 3D shapes can be picked up and held. The physical difference becomes clear through this hands-on comparison.
What you need:
- Large 2D shapes taped to tables
- Corresponding 3D manipulatives
- Crayons for tracing
- Recording sheet with two columns
Steps:
- Place a large paper square on each table with a wooden cube beside it
- Demonstrate tracing around the paper square with your finger, then trying to “trace” the cube (impossible!)
- Show picking up and holding the cube, then trying to pick up the paper square (it just lifts off the table)
- Students rotate through stations, tracing 2D shapes and holding 3D shapes
- They record their findings: “I can trace…” and “I can hold…”
Strategy 4: Face Counting Investigation
Students explore how 3D shapes have multiple faces while 2D shapes have just one face. This strategy builds analytical thinking while reinforcing the dimensional difference through systematic exploration.
What you need:
- Wooden or foam 3D shapes
- Small dot stickers
- Recording sheets
- 2D shape templates
Steps:
- Give each student a cube and demonstrate finding each face by placing a sticker on it
- Students count faces on their cube (6) and record the number
- Repeat with other 3D shapes: rectangular prisms, triangular prisms, spheres (“How many flat faces can you find?”)
- Compare with 2D shapes: “How many faces does this paper square have?” (1)
- Create a class chart showing face counts for each shape
Strategy 5: Shape Hunt and Classify Game
Students become shape detectives, hunting for examples of 2D and 3D shapes in their environment. This authentic application helps them see geometry in the real world while practicing classification skills.
What you need:
- Clipboards with recording sheets
- Digital camera or tablets (optional)
- “Shape Detective” badges
- Classroom timer
Steps:
- Assign students to hunt for shapes in specific areas: dramatic play center, library corner, art supplies
- They sketch or photograph examples of flat shapes (posters, book covers, paper) and solid shapes (blocks, balls, containers)
- Set a 10-minute timer for focused hunting
- Gather to share discoveries and justify classifications
- Create a class book of “2D and 3D Shapes in Our Classroom”
How to Differentiate 2D vs 3D Shape Learning for All Learners
For Students Who Need Extra Support
Focus on the most obvious examples first. Start with a paper circle versus a ball — the difference is dramatic and easy to feel. Use only 3-4 shape types initially (circle/sphere, square/cube) before adding triangles and rectangles. Provide lots of hands-on manipulation time and use consistent language: “flat like a pancake” for 2D shapes and “thick like a sandwich” for 3D shapes. Partner these students with confident peers during sorting activities.
For On-Level Students
These students can handle the full range of basic 2D and 3D shapes covered in CCSS.Math.Content.K.G.A.3. They benefit from systematic comparison activities and can begin using proper geometric vocabulary (two-dimensional, three-dimensional). Give them opportunities to explain their reasoning and teach others. They’re ready for shape hunts around the school and can create their own shape sorting games.
For Students Ready for a Challenge
Introduce more complex 3D shapes like pyramids and prisms. Have them explore how 2D shapes relate to 3D shapes (“What 2D shapes do you see on this cube?”). They can create shape riddles for classmates (“I’m thinking of a solid shape with 6 square faces”) and investigate shapes with both flat and curved surfaces like cylinders and cones. Connect to real-world architecture and ask them to design buildings using specific shape requirements.
A Ready-to-Use Kindergarten Geometry Resource for Your Classroom
After using these strategies with my students, I created a comprehensive geometry pack that takes the guesswork out of planning differentiated practice. This resource includes 79 problems across three difficulty levels — 22 practice problems for students who need extra support, 30 on-level problems for grade-level expectations, and 27 challenge problems for advanced learners.
What makes this pack different is the systematic progression from concrete identification to more abstract classification. The practice level focuses on obvious examples with visual supports, while the challenge level includes tricky scenarios like identifying 2D shapes within 3D objects. Each page includes clear directions and visual cues, so students can work independently while you support small groups.

The pack covers everything you need to meet CCSS.Math.Content.K.G.A.3 with confidence, including answer keys and differentiation notes for each level.
Grab a Free Shape Sorting Activity to Try
Want to test these strategies with your students first? I’ll send you a free 2D vs 3D shape sorting mat that you can use with any manipulatives you have on hand. It’s perfect for math centers or small group work.
Frequently Asked Questions About Teaching 2D vs 3D Shapes
When should I introduce 3D shapes in kindergarten?
Most kindergarten curricula introduce 3D shapes in winter or spring, after students are comfortable identifying basic 2D shapes. Students need a foundation with flat shapes before they can understand the contrast with solid shapes. The comparison between dimensions is what makes CCSS.Math.Content.K.G.A.3 meaningful.
What’s the difference between teaching shape names and teaching dimensions?
Shape names focus on identification (“This is a triangle”), while dimensional understanding focuses on properties (“This triangle is flat — it’s a 2D shape”). The Common Core emphasizes properties over memorization. Students should understand why a shape is 2D or 3D, not just memorize categories.
Should I use the terms “2D” and “3D” with kindergarteners?
Yes, but introduce them gradually alongside child-friendly terms. Start with “flat” and “solid,” then add “2D means flat” and “3D means solid.” By the end of kindergarten, students should recognize both sets of terms. The formal vocabulary builds academic language skills.
How do I help students who confuse spheres and circles?
Use the flat hand test consistently. Students should physically place their hand against circles (it lies flat) and spheres (hand curves around). Emphasize that circles are drawn or cut from paper, while spheres are balls you can hold. Practice with obvious examples like paper circles versus tennis balls.
What manipulatives work best for teaching this concept?
Use real objects rather than plastic shape sets when possible. Wooden blocks, balls from the playground, paper cutouts, and everyday classroom items make the dimensional differences obvious. Pattern blocks work well for 2D shapes, while wooden unit cubes and spheres provide clear 3D examples.
Ready to Build Strong Geometry Foundations
Teaching kindergarteners to distinguish between 2D and 3D shapes builds spatial reasoning skills that support all future math learning. The key is giving students plenty of hands-on exploration time with real objects, focusing on the fundamental difference between flat and solid rather than just memorizing shape names.
What’s your favorite strategy for helping kindergarteners understand the difference between flat and solid shapes? Try the free shape sorting activity and let me know how it works with your students!